Most of you know that you can store ERC20 tokens on Trezor and Ledger hardware wallets. But did you know that you can also use them to store and manage tokens like BEP20 (Binance Smart Chain tokens) and HRC20 (Harmony One tokens). In addition, both hardware devices also support Polygon Matic network, Fantom network and most other EVM chains such as Arbitrum, Avalanche, etc.
In this beginner’s guide, we’ll look at how to store and manage any tokens using popular hardware wallets such as Ledger and Trezor. In addition to storing tokens, we will also explain how you can safely store NFTs and access NFT markets such as OpenSea using your hardware wallet.
Now, before we look at how to store and manage any type of token or NFT on a hardware wallet, let’s understand the basics. First you need to understand the difference between a coin and a token, the different types of token standards, and how they work.
If you’ve been following us, you already know how to store tokens and NFT on a hardware wallet. We didn’t do an exclusive tutorial, but we’ve covered it all before in separate articles. In any case, we’ll give a brief explanation here. This should help you store and manage tokens and NFT on Ledger Nano and Trezor hardware wallets.
Why do I need a hardware wallet?
If you are just starting out in this field, buying cryptocurrencies will be your first challenge. One of the biggest problems after buying a coin or token is how to protect it.
Hardware wallets are considered the gold standard of security in the cryptocurrency space. They provide both security and convenience. We recommend popular hardware wallets such as Ledger or Trezor to secure your assets. They are more secure and offer a better way to store your crypto assets.
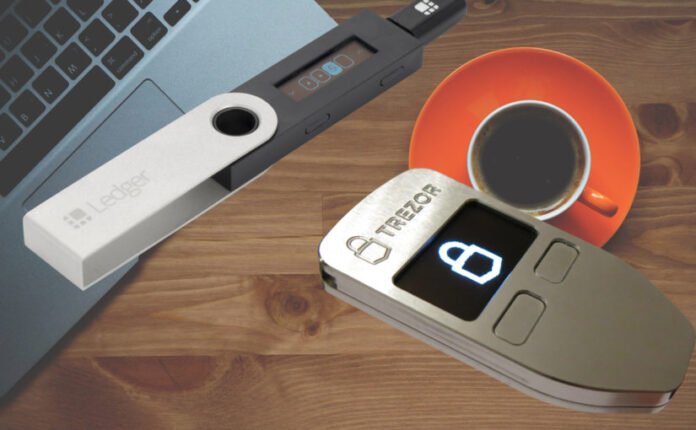
Both Trezor and Ledger are well-known hardware wallets in the industry and are user-friendly. A hardware wallet is a physical device, like a USB device, that can be used to securely store cryptocurrency.
When we say “cryptocurrency,” we mean private keys. You have to understand that real assets are not stored in your wallet. They are on the corresponding blockchains. Your wallet simply holds a private key to unlock those funds. Hardware wallets are cold stores that securely store your private keys offline, and they are much more secure than software and web wallets.
Ledger and Trezor are leaders in cryptocurrency security. Their devices use BIP39 passphrases in which private keys never leave the device.
Asset support
In addition to security, they are both true multi-currency wallets that support more than 1,000+ cryptocurrencies. You can store such popular coins as Bitcoin (BTC), Ethereum (ETH), Binance Coin (BNB), Polkadot (DOT), Cardano (ADA), Solana (SOL), Ripple (XRP), Monero (XMR), Stellar (XLM), Avalanche (AVAX), Terra (LUNA), Tezos (XTZ), etc.
In addition to coins, you can also store tokens such as USDT, USDC, Shiba INU (SHIB), wBTC, DAI, Chainlink, FTX, Axie infinity (AXS), AAVE, MANA, Uniswap (UNI), Graph Token (GRT), Yearn.Finance (YFT), Celo (CELO), Ocean Token (OCEAN), Reef Finance (REEF), etc.
Now, before you decide whether to choose Ledger or Trezor, take a look at the assets they support. First, you need to find out which coins/tokens you own are supported by the device.
Coins and tokens supported by Ledger:
For the Ledger device, also check out this link on GitHub:
Here you can find your favorite token by smart contract address and see if Ledger supports it or not.
Get familiar with the coins and tokens supported by the Trezor hardware wallet:
Asset management
After you purchase and set up a hardware device, you cannot use it right away. You need a compatible software wallet to manage the hardware wallet assets.
For example, to send a transaction, you need to connect your device to your computer and connect it to a web wallet or software wallet. You only use the software interface to initiate the transaction. But the transaction is signed by your hardware wallet.
No matter where you connect your hardware wallet and no matter what type of transaction, the signing always happens inside the hardware wallet. Your private keys remain secure and never get into the site/software or computer to which it is connected.
Both Ledger and Trezor offer a formal software wallet interface for managing your hardware device. For Ledger devices, there is the Ledger live app, which is available for desktop and mobile devices. For Trezor devices, there is the official Trezor Suite desktop app. Both apps make it easy to manage your hardware device. You can send and receive funds, manage different assets, track cryptocurrency balances in real time, and even get full access to your portfolio information.
However, there are some limitations. Both Trezor suite and Ledger live app do not have full support for all coins and tokens available in the cryptocurrency space. They do support Ether and most ERC20 tokens. But what about BEP20 tokens, ERC-777 custom tokens, ERC-721, etc. The device supports NFT and all kinds of custom tokens on other EVM chains, but you can’t manage them directly through official apps like Ledger live or Trezor suite.
To manage a specific type of asset, you need a specific type of wallet (software interface). The above link, which provides a list of supported coins and tokens, also specifies the type of wallet you need to manage cryptoassets.
Application compatibility
In addition to using the official app, both Trezor and Ledger also support integration with many other third-party wallet apps. There are many independent wallets such as Electrum (for Bitcoin), MyEtherWallet, Mycelium, MetaMask, MyCrypto, etc.
Check the list of supported Trezor applications:
You can use these third-party wallets to manage assets that are not officially supported by Trezor. In addition to those listed on the official website, there are many other third-party wallets that support Ledger and Trezor hardware wallets. All you have to do is connect your hardware wallet device to the software, and once connected, you can send/receive and store any tokens of your choice.
Trezor and Ledger also support NFT transactions. That is, they allow you to receive, store and send NFT tokens (all NFTs created according to the EIP-721 standard) that exist in the Ethereum network. But to manage and sign an NFT transaction, you need to connect and use a hardware wallet with a third-party software interface.
For example, you can use MyEtherWallet, Metamask or a similar application to store and manage Ethereum, ERC-20 and, EIP-721 tokens in your hardware wallet. For BEP20 tokens, polygon chain tokens and other EVM tokens you can use your hardware wallet with Metamask.
EVM, ETH, NFTs, ERC20, BEP20, HRC20, coins and tokens?
Again, we have explained all this before in several articles. In any case, first understand the difference between a coin and a token. Coins use their own autonomous blockchain. Whereas tokens do not have their own blockchain and do not run on it. They are hosted and issued on another blockchain. Consider, for example, Ethereum and ERC20 tokens.
Ethereum is an open-source blockchain and computing platform that allows the creation of tokens, smart contracts and decentralized applications. ETH (Ether) is the coin and native cryptocurrency of the Ethereum blockchain.
ERC20 is a user-generated token on the Ethereum blockchain. Anyone can create an ERC20 token that meets certain standards and can be used in transactions and exchanged for other tokens. There are currently over 70,000 ERC20 tokens, all compliant with the ERC20 Token Standard.
In addition to ERC20, there are other types of tokens on the Ethereum blockchain, such as ERC-777 and ERC-721. For example, NFTs (Non Fungible Token) use ERC 721, which is the official token standard for NFTs on Ethereum.
Now, since tokens like ERC20 and ERC-721 are created on the Ethereum network, you can use your Ethereum address to store and manage these assets. And to transfer these tokens into the ETH network, you will have to pay a transaction fee in ETH, since it is the native currency of the Ethereum blockchain.
It is important to note that you can store ERC-20 and other Ethereum-based tokens in any popular Ethereum wallet except your exchange address. If you are sending a token to your exchange address, first make sure that the exchange supports the token. Sending an unsupported token can result in a permanent loss of that token.
On the other hand, if you use an Ethereum wallet where you control private keys, you can send any ERC20 and NFT to your Ethereum address. The tokens are stored at the address to which you control the private keys. You can check token balances on blockchain researchers such as Etherscan. However, transacting and managing these tokens on some wallets can be quite a complicated process.
Now you know the difference between a coin and a token. You also know the basics of ETH, ERC20 and other tokens in the Ethereum network. Now what about tokens like BEP20, HRC20, etc.?
Alternative EVM network tokens
- ERC20 tokens are tokens issued on the Ethereum blockchain.
- BEP20 tokens are tokens issued on the Binance smart chain.
- And HRC20 tokens are tokens issued on the Harmony One network.
The success of the Ethereum blockchain has led to other blockchains providing similar capabilities, such as the ability to create tokens, smart contracts and decentralized applications. There are chains that use their own technology and those that are compatible with EVM (Ethereum Virtual Machine).
You have side chains such as Matic (Polygon), Arbitrum and Optimism. There are also independent blockchains such as Binance Smart Chain, Harmony One, Fantom, etc.
These are all EVM chains that use and support the Ethereum token standard. So, using not only ERC20, but also your Ethereum address, you can store tokens of any type in any EVM network. Since they are all EVM-compatible, the wallet address for all of these networks starts with “0x” characters.
Now let’s take a look at how you can safely store tokens and NFTs on hardware wallets like Ledger Nano and Trezor.
Storing tokens and NFTs on a hardware wallet
Ledger and Trezor devices fully support Ethereum (ETH) and ERC20 tokens. They also support NFT, and since the device supports tokens created on the Ethereum platform, it also supports tokens from other EVM chains. You can simply send any token to the Ethereum ERC20 token hardware wallet address that starts with 0x. However, the transaction and deposit may not show up in official applications such as Ledger Live and Trezor Suite.
Don’t worry, the tokens are stored securely on your device in the appropriate blockchains. In addition, the device protects the private keys of all your addresses on all blockchains. To check your token balance, you can use special blockchain explorers.
You will now have to use your Ledger and Trezor devices with alternative wallets such as MyEtherWallet (MEW) or Metamask to access, store and manage unsupported tokens. These wallets are designed specifically for Ethereum assets and support any type of ERC20 tokens. In addition to ERC20, applications such as Metamask can connect to other EVM blockchains, making it easy to manage tokens and NFT with a hardware wallet.
All you have to do is set up Metamask and connect the Ledger / Trezor device to Metamask. No worries. Your initial and private keys are fully protected by the hardware device. They will never, under any circumstances, be opened. Think of Metamask as a dashboard that allows you to better manage your Ledger and Trezor hardware wallet assets.
Metamask and hardware wallet connection
First of all, you must have a fully configured Metamask. Next, you will need a fully configured Ledger or Trezor device. During setup, the device generates a mnemonic seed for your wallet. This is your backup. Write it down on paper and keep it in a safe place offline. To set up your Ledger and Trezor devices, you can use the guides available on the official website. The setup process is simple and only takes a few minutes.
Now that you have the Metamask and the hardware wallet ready, the next step is to connect them.
Store and manage any tokens on Ledger and Trezor
First of all, ERC20 tokens and most NFTs are on the Ethereum blockchain. Therefore, all of your tokens will be included in your Ethereum account. To store tokens in a hardware wallet, simply send them to the ETH address of your hardware wallet. That is, you can send assets to the ETH address generated by your device.
Once Metamask and the hardware wallet are successfully connected, the ETH address of your hardware wallet will be imported into Metamask. This address will be marked as Hardware.

Open metamask and use only those addresses marked as Hardware to receive Ether and ERC20 tokens. You can transfer any Ethereum-based tokens to the ETH address of your hardware wallet connected to metamask. It will display your ETH balance and ERC 20 token balance separately.
Metamask displays most of the tokens in your account, with the exception of a few custom tokens. Don’t panic if the ERC20 token you sent to your Ethereum address is not displayed. Always check the blockchain first, and as long as you control the private keys, everything should be fine.
You can manually add any custom tokens that are not displayed by Metamask. Once you add them, the missing deposit will appear under your ETH account in the metamask interface.
To add such custom tokens manually, you must specify the token-contract address, the token symbol, etc.
Tip: You can use blockchain researchers such as Etherscan or even use the official token website to find the contract address of the token. Beware of fake tokens.
Managing alternative tokens
Metamask is now connected to the main Ethereum network by default, so it only allows you to access and manage ETH and ERC20 tokens stored in your Ethereum wallet. To be able to store, manage, and make transactions with tokens from other chains, you must add the specific chain to metamask and switch to that network.
For example, to send BEP20 tokens from Binance, make sure you select the BEP20 network type when you withdraw your funds. After sending to your ETH address, switch your metamask to the Binance Smart Chain network, and the metamask will display your BEP20 tokens. This is not only mapping, but also the ability to have full control over the asset.
Now you can transfer tokens, connect to dapps, start betting, and do anything with DeFi using your hardware wallet. Ledger and Trezor are the best options when it comes to DeFi wallet. You can store any stable coins on Ledger / Trezor and connect it to DeFi sites like Aave, Compound and start betting or lending your stable coins safely from your hardware wallet.
Token transfer
To send ERC20 tokens, you need ETH as gas. Similarly, for each network, you need a specific native coin to cover the transaction fee for that particular network. For example, you need BNB to transfer BEP20 tokens and MATIC to transfer tokens on the Polygon network.
We’re almost done. With this workaround you can store and manage any tokens directly from your Ledger or Trezor wallet. Now you can connect your metamask to any Dapp site without any worries. Since all transactions take place inside the hardware device, your private keys will never be exposed.
If you are storing a large amount of ETH or ERC20 tokens, it is highly recommended to use Trezor or Ledger. It is the most secure and convenient option for storing and transacting ETH, ERC20 and other tokens.
NFT transactions
NFT transactions are similar to ERC20 and other token transfers. You can simply transfer any NFTs to the ETH address of your hardware wallet. Not only Ethereum-based NFTs, but using the ETH address of your hardware wallet, you can manage NFTs on polygon, BSC, and other EVM chains.
Now metamask does not display NFT under your ETH account. To view and manage NFT, you need to connect your metamask hardware wallet account to OpenSea, which is the NFT trading floor.
Here’s how it’s done.
Connecting OpenSea
Visit OpenSea and login to OpenSea using metamask. Make sure you are using an account/address that is connected to your Ledger or Trezor. Once you are connected to metamask, you can work normally with your accounts and NFTs.
On OpenSea you will see all your NFTs. You can hold them, transfer them, or put them up for sale. Just because transaction confirmation happens on a physical device doesn’t mean you need to keep the device connected all the time. Once a transaction is initiated and your NFTs are for sale, you can disconnect the device.
So you can safely place tokens, sell NFTs directly from your Ledger or Trezor. This is the gold standard for storing tokens and NFTs securely in your wallet. Now you can sleep soundly at night knowing that your JPEGs are safe and sound.
Note:
Before transferring NFTs or tokens to hardware accounts, try sending a small amount of tokens and cheap NFTs first to test. Then try transferring tokens and NFTs from a hardware wallet. If you are successful in this task, then you will be able to transfer all expensive items to cold storage. Remember that you will have to pay for gas to transfer NFTs and tokens.
Also do not use this method for Tezos, Solana and Cardano NFTs. These are separate networks, not compatible with EVMs like BSC, Polygon. Metamask is only for Ethereum, ERC20 and other EVM chains, which actually make up the majority of the DeFi space and NFT market.
In any case, to manage tokens from other individual networks, you’ll need a wallet that works with that particular network. For example, for Tezos, you need to use the Temple wallet and connect it to the Ledger or Trezor hardware wallet. The Temple wallet is similar to Metamask, but is designed for Tezos.
To connect to the Solana network using Ledger or Trezor, you can use the Phantom app, which is a browser extension similar to Metamask, but designed specifically for Solana.
Read more articles about cryptocurrencies and mining at CRYPTO-WALLETS.ORG.
The Telegram channel about cryptocurrency and mining Bitcoin, Ethereum, Monero and other altcoins:


