ETHEREUM MIST WALLET allows you to create two types of wallets – a simple wallet and a multisig wallet. The wallet runs on top of a full node, so be patient, it will take some time to download the blockchain to your computer. As of January 22, 2016, the blockchain size is 2.5 GB, depending on the speed of your Internet connection, this can take from 20 minutes to several days. A wallet allows you to do more than just send and receive money. There’s a whole section where you can deploy contracts, manage contracts, and interact with them. And also add token contracts that follow the standard token API.
Ethereum has two official wallets: Geth, a chic toy for programmers, and Mist, a tool for regular users (but it also uses Geth). The second one we will be interested in. And although today Mist wallet is still in beta stage, it copes with its duties well. Mist wallet works as a regular account with additional features being added at the moment. It has a really nice graphical interface, and for most people it will be much easier to use than the intimidating command line interface. The multi-signature wallet allows you to add multiple owner accounts and set daily limits. If the amount of money sent exceeds the daily limit, the multi-signature feature is triggered, requiring multiple signers to unblock funds.
You can find the latest wallet release on .
This wallet is still in the early stages of development, so caution is advised. Once fully synced, the Ethereum Wallet app will find all the accounts you have created on your PC and upload them to the interface (default keystore/account path on a Windows 10 PC: C:\Users\ \ AppData\Roaming\Ethereum\keystore). You will still need a password to transfer funds, but the whole process is much easier with a GUI. The wallet also has a contract interface. So, relax, wait for full synchronization and get ready to look into the world of tomorrow.
Instructions for Ethereum Mist
First, we download the Ethereum Mist version we need from GitHub (I chose the installer for Windows – Ethereum-Wallet-installer.exe) and run it.
GitHub Ethereum Mist Wallet:
Installation is extremely easy:
- select the folder where the client itself will be located, it will weigh less than 200 MB, so you can install it on drive C;
- next, specify the folder where the entire Ethereum blockchain will be stored (for today this is about 60 GB), and as we remember from the bitcoin wallet, it’s better to specify a disk where there are no problems with free space;
- well, that’s all – the installation is completed on this, and a shortcut is waiting for us on the desktop to run.
So – here we go! Start the client and see a window in which we politely asked in what network we want to work – in the test or in the main network:
Установка Mist – выбор сети
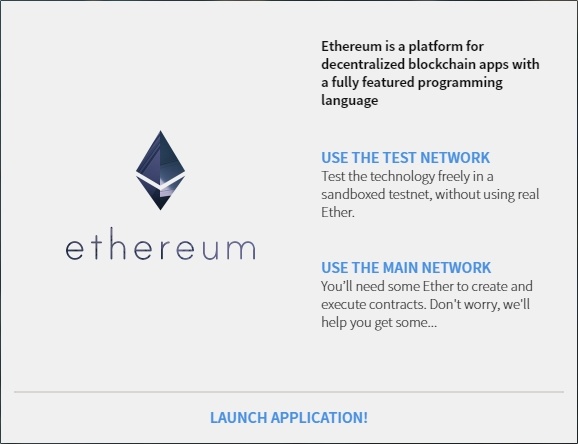
If someone just wants to get acquainted with the wallet, it is better to choose a test network – it does not load the whole blockchain, but only part of it, after a couple of hours of synchronization you will already be able to see the wallet interface. But since we are serious, we choose the main one – click on USE THE MAIN NETWORK. By the way, at the same time the background loading of blocks starts and the etherium blockchain starts to quietly move to our computer. And we see the following:
ETH Mist – restore from backup
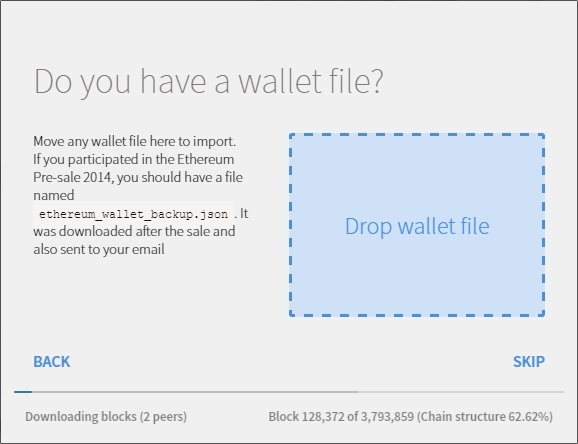
We are asked if we have a backup to quickly restore the wallet. If by some miracle you have a backup, you can download it. If not, which would be logical (after all, this is the first time we’re installing it), then we press SKIP and move on. Pay attention to the bottom part, where you can see the progress of the blockchain download. The upload goes pretty fast, but you still have to wait several days for synchronization. Those who were afraid to put themselves bitcoin wallet because of synchronization, I have not very good news for you – you are not lucky with Mist too. But what can you do, security is paramount and it’s all just for the sake of it.
Installing the Mist Wallet – Password Entry
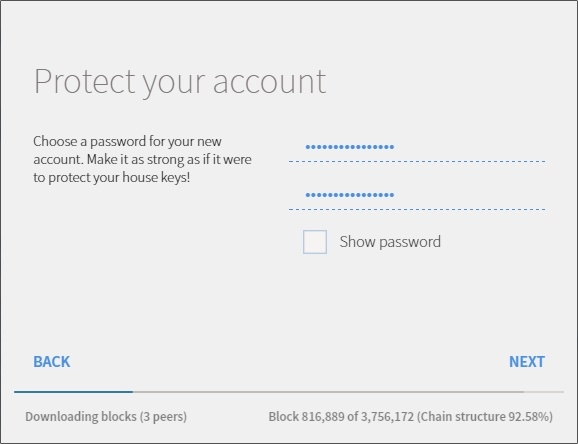
This step asks us to create a password for our first account. Enter it in two fields and press NEXT. Keep the password in a safe place. Even the client reminds us to back up our keys and passwords, and he won’t advise against it:

In the next window, there is a “menacing” warning about the fact that to work with the wallet you need to have some Ethereum on your balance (from 0.25 to 1 ETH). It can be immediately transferred to your account by pressing the DEPOSIT USING BITCOIN button and exchanging your bits for ether. Our Mist purse is “magically” connected with ShapeShift exchange (we already know it from Jaxx purse), that allows us to quickly convert one crypto into another. But we won’t do that yet, so we press NEXT.
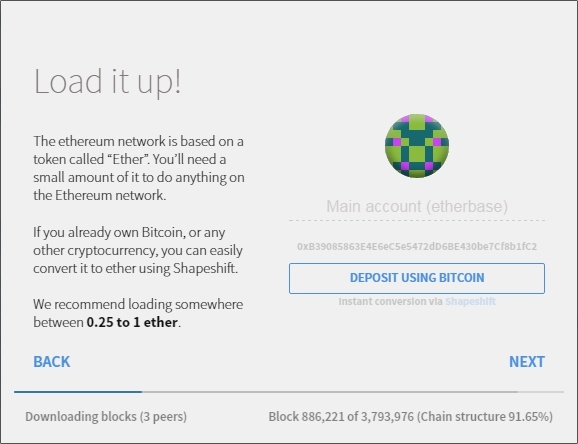
The current and the next two steps are purely informational (press NEXT all the time) – we are offered a fascinating read (but not exactly – it’s just all in technical English), while we wait for the synchronization to finish
How to use the Mist Wallet
After a few days, synchronization with the network was finished, and my computer again allowed to work adequately on it, before that I enjoyed a slideshow (another minus – also be prepared for this). Well, now our wallet is ready to go. Launch it – button LAUNCH APPLICATION! In front of us is the main interface of Mist, the official Ethereum wallet. It consists of 3 parts:
- Menu – provides quick access to the main actions. By the way, only for some reason it is translated into Russian, everything else will be in English. But I chose the English version for myself, since Russian was a little clumsy, which is very strange, because one of the founders comes from Russia;
- Sections – the main functionality: wallets, sending, contracts and balance;
- Work area – here you can find basic information or fields to fill in.
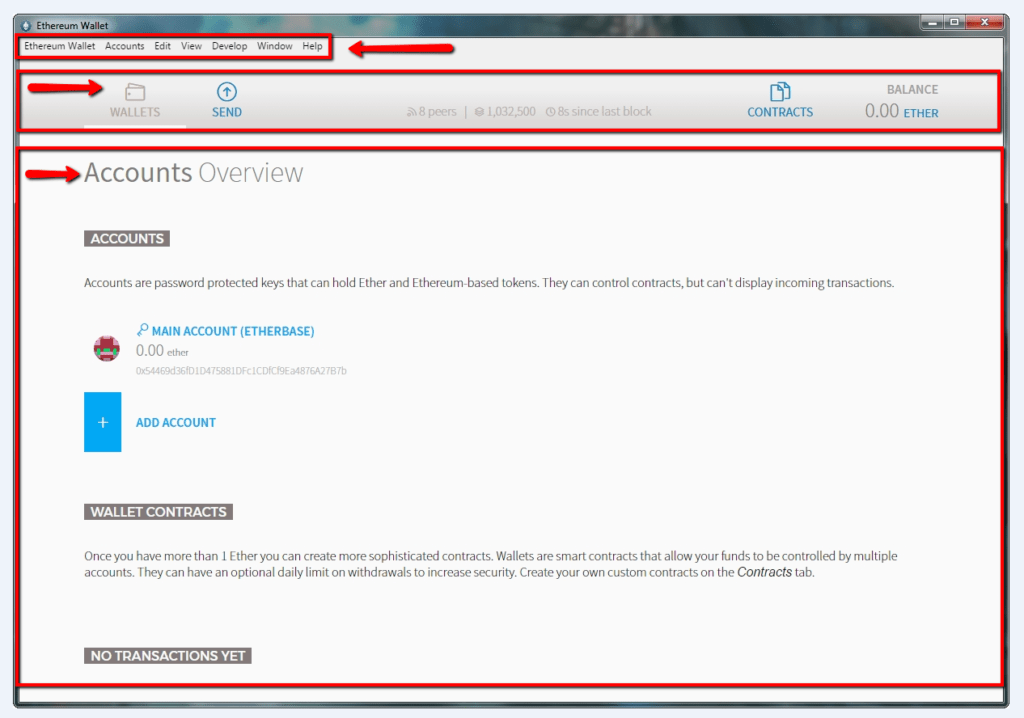
Mist, the WALLETS section. We are in the WALLETS section (this is where all work with accounts and wallets takes place). We initially have access only to the main account MAIN ACCOUNT (we created it during synchronization, it is necessary to have on balance from 0.25 to 1 ETH for normal work).
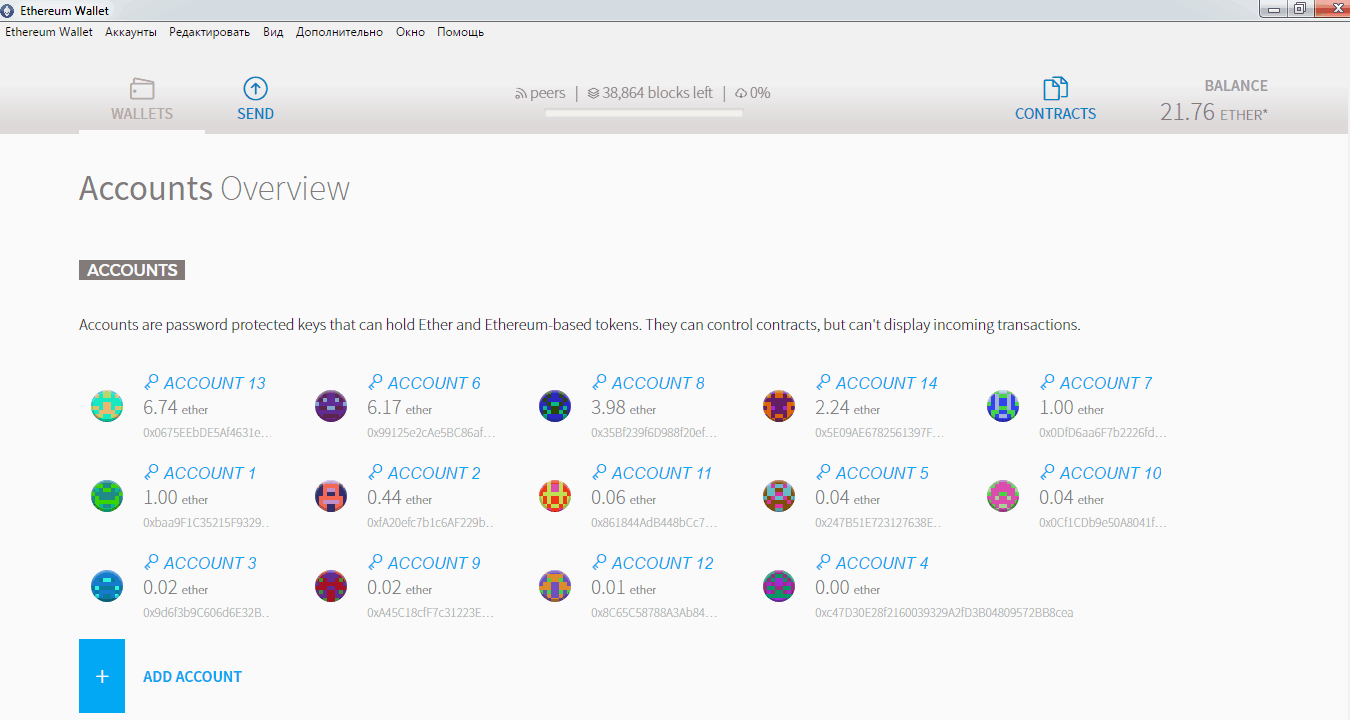
And here to create your own account, you need to click on ADD ACCOUNT and then come up with a password for it (you will need it when making transactions). For example, I created 2 new accounts – for playing in HYIPs and for testing:

If you go to any account (just click on its name), its basic information is available to you. You can rename it (just click on its name again) or make a transaction to its address, or top up your balance via bitcoins or bank cards (U.S. only), and copy the address (to pass on to someone else) and see the QR code:
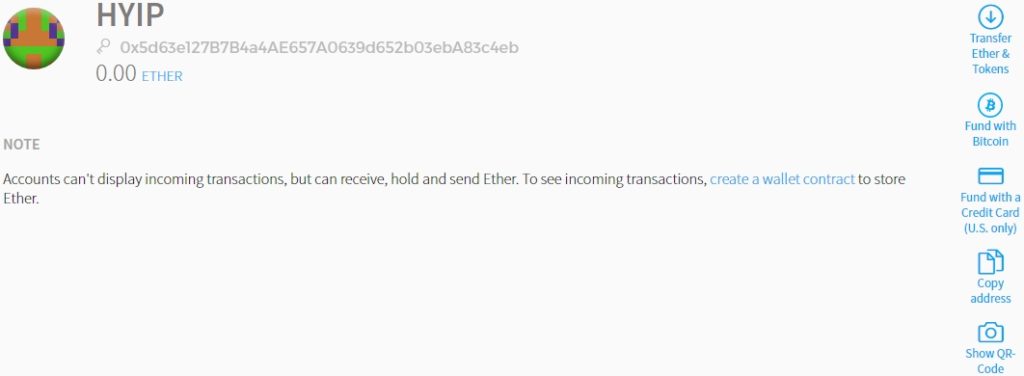
Bitcoins are deposited through the ShapeShift exchange. To do this, click on the Fund with Bitcoin icon:
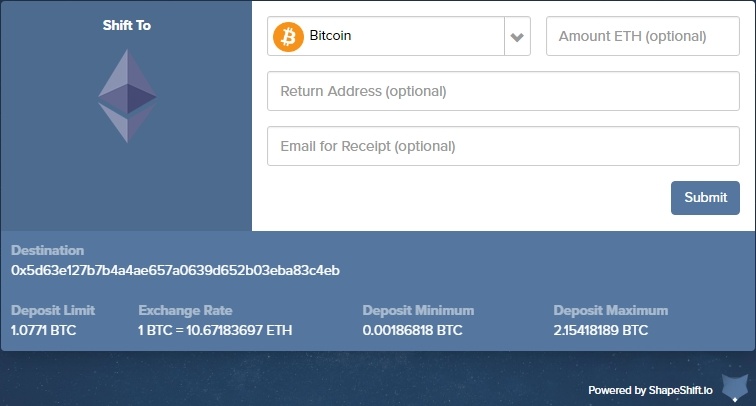
In the drop-down list of currencies there are a lot of altcoins in addition to bitcoins, so theoretically it is possible to refill through them as well. But I choose bitcoins, specify how much ether I need and click Submit. The address where to transfer the bitcoins will be shown and a timer starts – we are given 10 minutes for this operation. As soon as we execute transfer, requested amount of ether will appear on our balance. With replenishment via bank cards everything is about the same, but for us it is irrelevant.
Next, we move on to WALLET CONTRACTS, which are wallets themselves. But since we work with ether, not bitcoins, wallets are one of the types of smart contracts. And it is very important to understand the difference between a wallet and an account.
The wallet can be managed from one or more of our accounts, it has a daily withdrawal limit (for greater security) and it has a transaction history. Accounts do not have all of this. The only thing they have in common is that both of them can store ether and you can use them for transactions.
The disadvantages of the wallet can include:
- complex functionality that will require programming knowledge, so it makes no sense to recommend it to beginners;
- judging by the reviews, not all services can still work with contract wallets. And if there is no need for a portion of adrenaline, but there is only a desire to successfully complete the transaction, then it is better, of course, to use an account;
- to create it, there must be more than 1 ETH on the balance.
The wallets and accounts are taken care of. Now let’s see how air is sent. To do this, go to the section SEND:
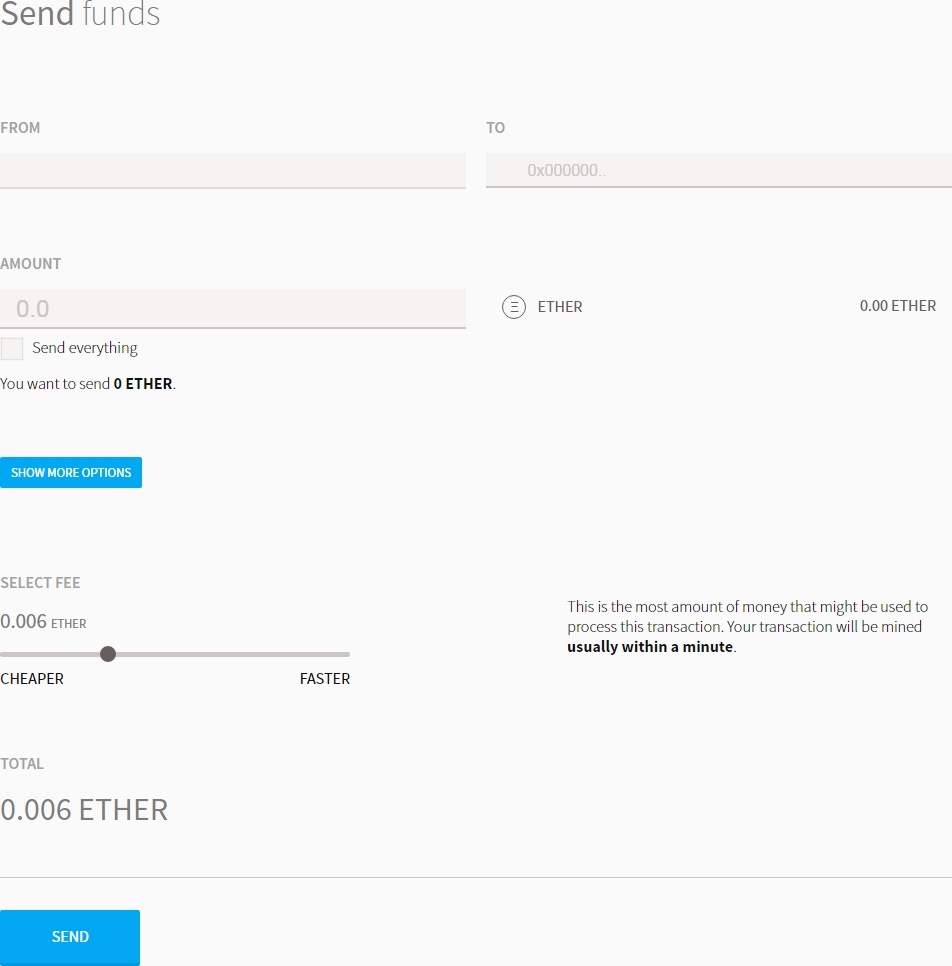
Anyone who has ever worked with bitcoins will find the interface familiar. In the first two fields we specify the addresses, from where and to where we will send the ether. In the AMOUNT field we specify the amount of ether. By clicking on SHOW MORE OPTIONS, we can add a description of the transaction. A little lower select the commission: set a large commission – the transaction flew away in seconds, set a small – here it is as luck. That’s all, just press the SEND button and wave bye-bye. The next section is CONTRACTS. For most users it will be irrelevant (but it will be appreciated by companies and developers), so I will briefly tell you what’s here and why.

In this section you will be able to deploy your smart contracts. If you don’t need your own, you can connect to already deployed contracts on the blockchain for familiarization or interaction (you will need to know their address and description for this). And you will also be able to create, send and track your own cryptocurrency. It’s very simple 🙂
And the last section – BALANCE. This is just a numerical display of the amount of ether in your account. It is possible to convert to other currencies for better understanding of ether value (FINNEY is 1/1000 ETH):

Here we have reviewed the installation and work with the official Ethereum wallet. Let’s summarize briefly. The strengths (pros) of the Mist client:
- official Ethereum wallet – new features and features will appear faster than in alternative options;
- very high level of security – you don’t have to worry about ether, unless you yourself give access to an attacker, you won’t lose your keys or forget your password;
- simple interface and no complicated settings – just go and work, a great option for beginners (if you don’t get into contracts);
- private keys are stored locally on side of the user, so only we are responsible for their safety;
- multi-platform – there are Mist clients for different operating systems.
This can also include the creation of smart contracts. But this is a plus only for a very narrow circle of professionals. But then many will use the fruits of their labor – and this is already good for everyone. Weaknesses (but it is, rather, not minuses, but the compelled necessity):
- The first Mist wallet sync takes a very long time. Therefore, between the first launch and the start of work, there may be a break of up to several days, although it cannot be compared with bitcoin;
- during synchronization (after the initial one, it starts as soon as new blocks appear in the network, and this is almost constant), the client takes all the resources of the computer, therefore, keeping it constantly open is not an option;
- the ether blockchain takes up quite a lot of space – now, of course, it is less than two times than the bitcoin blockchain, but a couple of years will pass and then…
Security and backup
And lastly, an important point is to create a backup copy. Since security rests on our shoulders, we have to take care of it ourselves. It would be logical to make a backup directly through the interface of the Mist wallet itself:

But as it turned out, the logic fails here. Maybe it’s me personally this functionality does not work – when you click on Accounts nothing happens. But if you face the same problem, here’s a manual alternative. Remember when we installed client we’ve specified where blockchain will be stored? Well, you can go there and see the keystore folder – that’s where our keys are:

Keep your wallet keys safe. Here are our three keys to our three accounts. Just copy them and put them in a safe place. If anything happens, you can always restore your accounts and not lose your ether, of course, if you haven’t lost your passwords before.
Read more articles about cryptocurrencies and mining at CRYPTO-WALLETS.ORG.
Telegram-Channel about cryptocurrency and mining Bitcoin, Ethereum, Monero and other altcoins @cryptomineg
