Creating an Avalanche (AVAX) Wallet is affordable and easy. This is a quick beginner’s guide with instructions on how to create and use an Avalanche wallet. Well, you can connect your Metamask to the avalanche network and use it as an AVAX wallet. But it can only be used as an AVAX-C-ARC20 wallet. Metamask only supports the Avalanche C-Chain, which is a contract chain, an instance of the Avalanche-based Ethereum virtual machine. Thus, in Metamask connected to the Avalanche C-Chain network, you can only store, send and receive AVAX and AVAX ARC20 tokens, which are similar to ERC20 in Ethereum and BEP20 in Binance Smart Chain .
In addition to the AVAX C-Chain, Avalanche has 2 other separate chains, the X-Chain and the P-Chain, each with a different role and unique functions. To be able to store, send and receive AVAX in all three chains, you need an Avalanche Wallet, also known as an AVAX Wallet.
With the official Avalanche wallet, you can not only store, send and receive AVAX and ARC20 tokens, but you can also transfer tokens between Avalanche chains and place AVAX in the Avalanch blockchain.
How do I set up my Avalanche Wallet?
The AVAX Wallet is an open source web wallet.
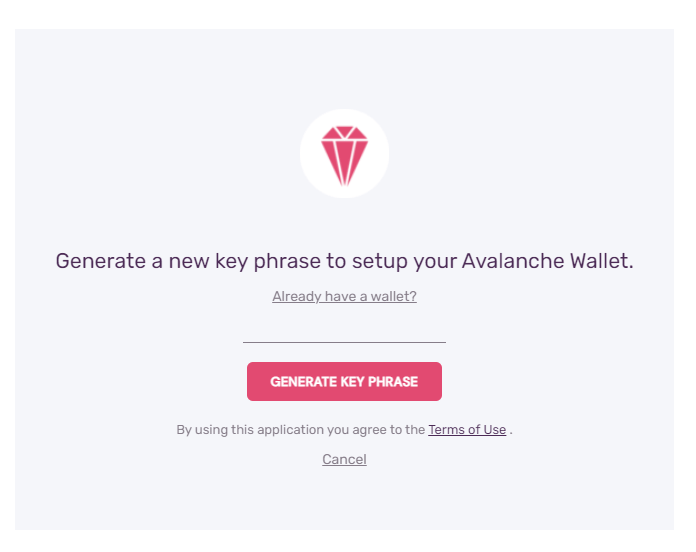
1. To set up a new wallet, follow this link:
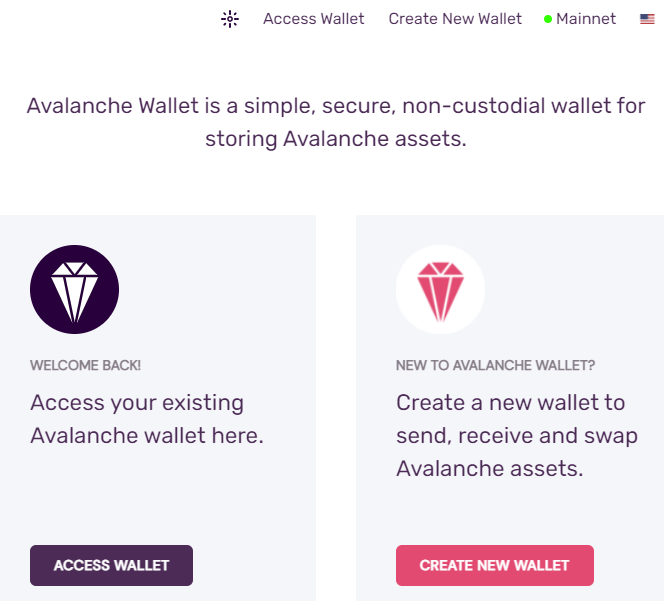
2. Then click “Create New Wallet” to send, receive, and exchange Avalanche assets.
3. At the next screen, click “Create a new key phrase” to configure the Avalanche wallet.
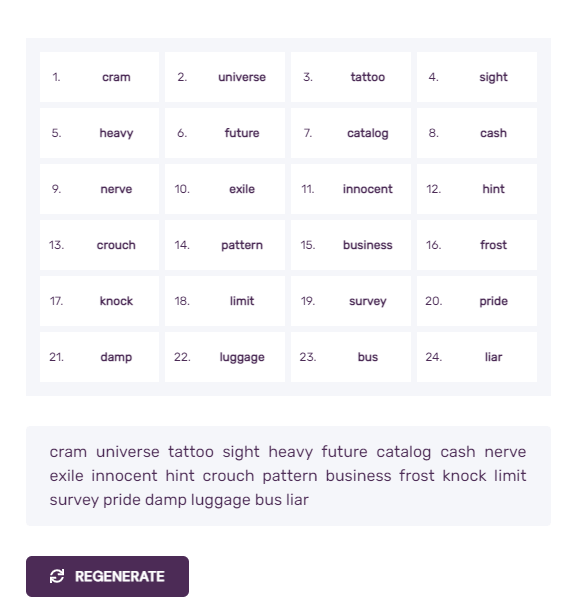
The wallet will then generate a passphrase for you from 24 random words. You can create a new set of words or copy the one shown on the screen. But be sure to make a backup copy of the passphrase provided. Order is most important, and note that this information is critical to the security of your Avalanche assets. Also, never share it with anyone, otherwise your wallet will be compromised.
You must then use these 24 words in consecutive order to fully restore/restore your Avalanche Wallet.
After you’ve secured the backup phrase, click “I’ve saved my passphrase in a safe place” and click “Access Wallet.”
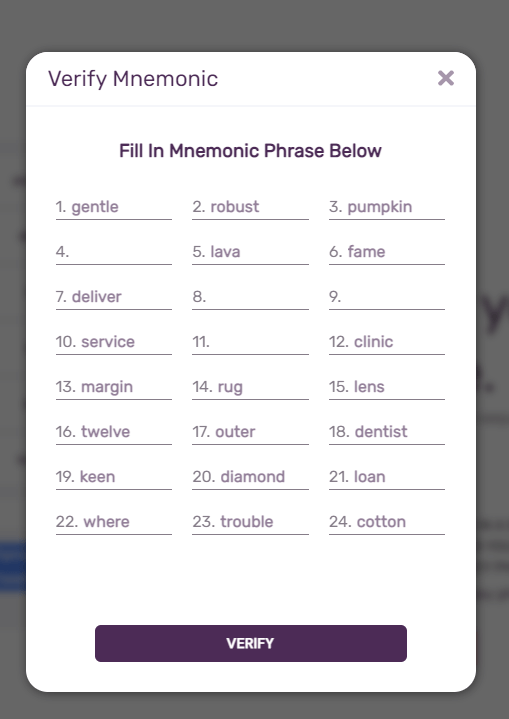
4. You will now be asked to check the mnemonic order. Complete the missing mnemonic phrase by referring to your written copy. Then click “Confirm” and then click “Access Wallet” to access your Avalanche Wallet.
That’s it! Your Avalanche Wallet is ready.
Note.
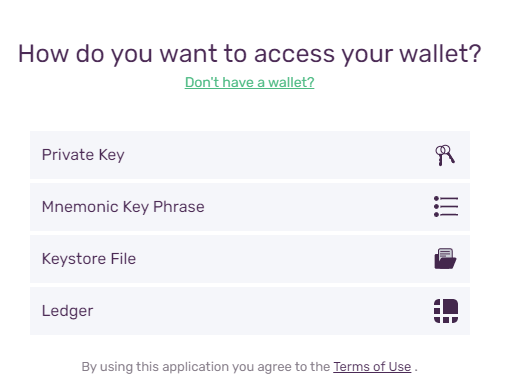
Avalanche Wallet automatically disconnects you if you are not active. You must log in again using your mnemonic phrase. Click Access Wallet to access your existing Avalanche Wallet. Select the mnemonic passphrase as your access option. On the next screen, enter your 24-word mnemonic phrase and click Access Wallet to regain access to your wallet.
Avalanche address:.
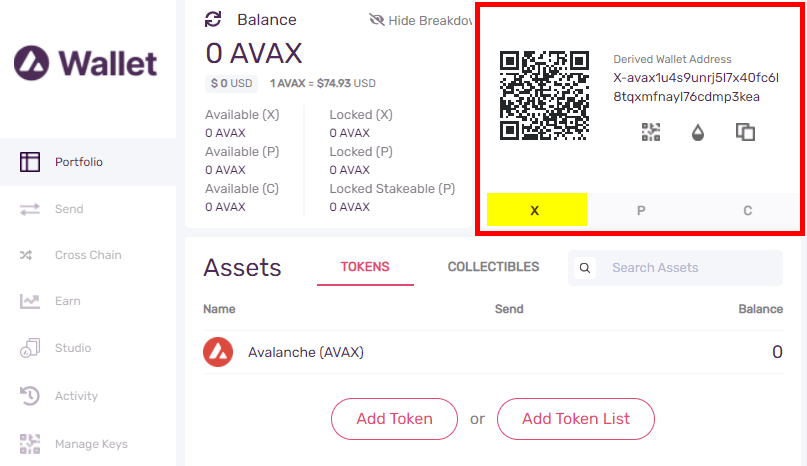
As you can see, the wallet is simple and straightforward. The toolbar displays information about your assets, such as tokens and collectibles. You will also find your wallet address on the right side of the main screen. The same page also displays the available/locked balance in X, P, and C chains.
In the Avalanche Wallet, you can store coins in the Avalanche X-Chain, Avalanche P-Chain, and Avalanche C-Chain addresses.
To receive funds, first determine and choose a chain. Most exchanges support transferring funds to X-Chain. But remember that Metamask only supports C-Chain.
You can get AVAX on exchanges such as Binance .
Remember to select the correct chain. Once selected, click the copy icon to copy the wallet address. Then send tokens to that address. Try transferring small amounts. Once you feel confident and the transfer is successful, transfer larger amounts.
Also note that your X-Chain address will change after each deposit. But you can continue to use your old address.
Now that you have the tokens in your Avalanche wallet, let’s see how to send them to an external wallet address.
Sending AVAX and sending AVAX (C-CHIN and X-CHAIN)?
Since P-Chain is a chain of platforms, you cannot send tokens directly from P-Chain. You can only send AVAX from C-Chain or X-Chain. If you have funds in your P-Chain address, you need to transfer them to X or C Chain using the cross-chain function, which we will cover shortly.
Now, before sending from your Avalanche wallet to an external address, select a chain and make sure that your exchange account’s external wallet or AVAX deposit address supports that particular chain.
For example, let’s assume that you received funds in your Avalanche C Chain wallet, but the exchange you are transferring money to only supports the X Chain address. In that case, use the cross-chain feature to transfer funds from the C-Chain address to the X-Chain address. Then send coins from your X-Chain selected as the source chain.
1. To send tokens, click the “Send” tab of your Avalanche Wallet.
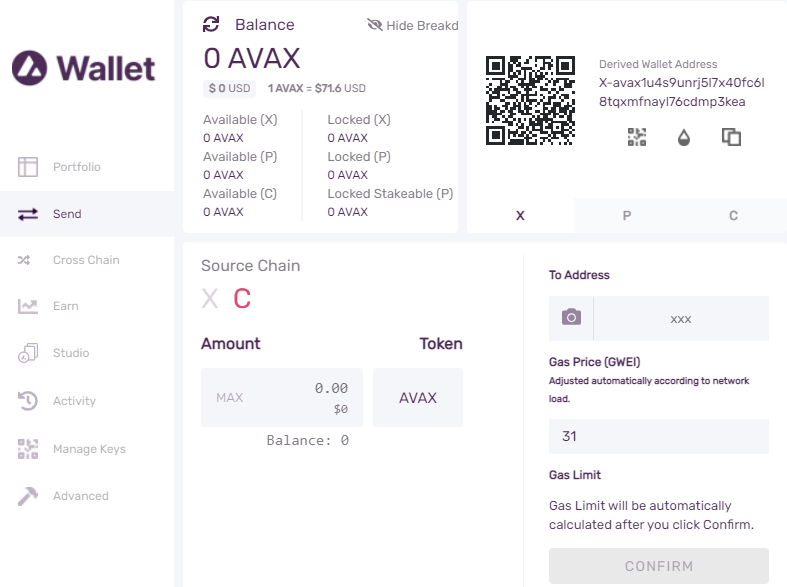
2. Then select an initial chain, which is chain X or chain C.
Note.
To send AVAX or Avalanche assets from your Avalanche wallet, you will need a small amount of AVAX, which is a fee charged to confirm the transaction in the blockchain.
If you transfer using the AVAX X-Chain, it will cost you about 0.001 AVAX per transaction. If you transfer from the AVAX C-Chain, it will cost you about 0.004725 AVAX per transaction. As you can see, the amount of commission is insignificant.
3. After selecting the initial chain, select the token, enter the address and amount to send. If you are sending it through X-Chain, pay attention to the memo. Some exchanges require the memo to be included. If you are transferring via C-Chain, set the price to gas ( GWEI ), and then confirm the transaction.
Remember to check the address and chain carefully before transferring coins/tokens to the Avalanche network.
Use Avalanche Block Reviewers to view addresses and track token transfers.
That’s it! Now let’s see how to transfer tokens between Exchange (X), Platform (P) and Contract (C) chains using the cross-chain function.
Cross-chain – transmission between X-chain, P-chain and C-chain
Avalanche supports moving AVAX between chains with atomic swap support. So you can transfer AVAX between X-Chain, P-Chain and C-Chain.
Here’s how you can transfer AVAX tokens between X-Chain, P-Chain, and C-Chain.
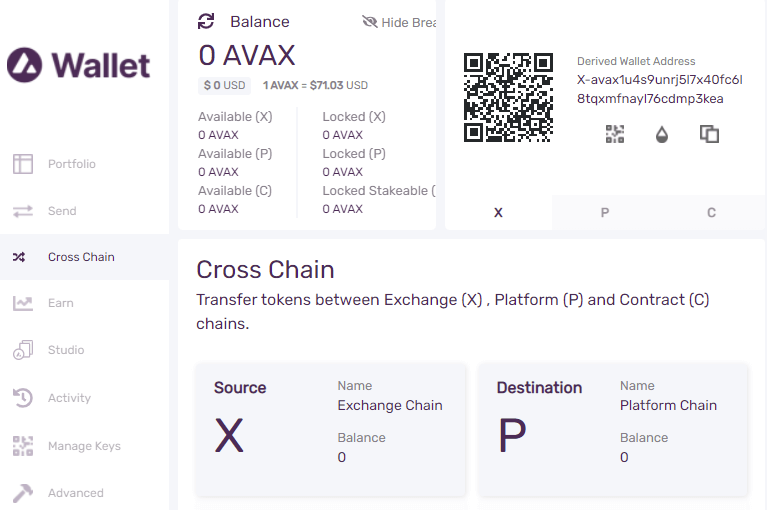
Open your wallet and click the “Cross Chain” tab to transfer between chains. Now to transfer AVAX between chains, you need to have AVAX as a commission. So don’t transfer the entire amount. Leave some to be paid.
Then select a source chain (from) and a target chain (to). After selecting the source and target strings, you will see the available balance in both strings. Then enter an amount to transfer from the source chain to the target chain. The transfer fee will be shown on the same screen. Confirm this and tap confirm the transfer to start the transfer.
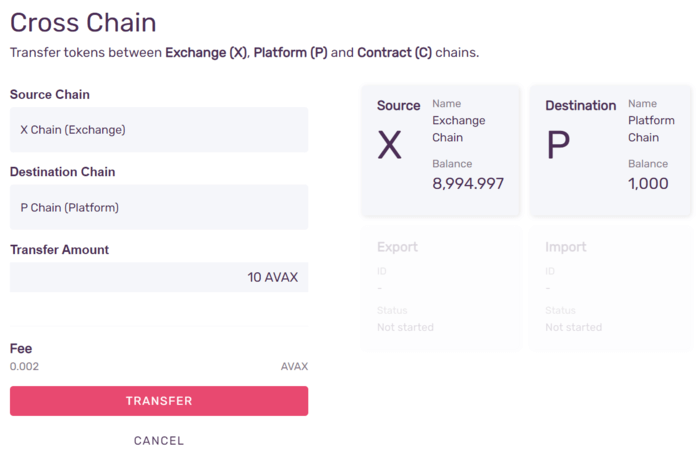
That’s it! You have successfully transferred AVAX between networks. Now you can use them as you see fit. You can transfer AVAX back and forth between any of the three chains at any time using your Avalanche Wallet’s cross-chain feature. All it will cost you is a small amount of AVAX as fees.
To learn more about passing between chains using API calls, follow this link:
Earn AVAX
Another important feature you can find in your Avalanche wallet is the wallet earning feature. By earning, you can earn more AVAX by placing your existing tokens.
As we said before, in order to place AVAX tokens and earn AVAX, you need to become either a validator or a delegate in the Avalanche network. To do this, you need to transfer the required number of tokens into the P-Chain.
When you have tokens in the P chain, you can validate or delegate them and start earning.
We’ll put together a separate guide on how to stake your AVAX tokens using the Avalanche Wallet.
If you want to learn now without risking your coins, you can connect your wallet to the test network and try the betting function.
You can get the AVAX test network from the AVAX test tap:
Testnet is a free and easy way to play with the Avalanche blockchain.
In the upper right corner of your wallet, you can switch between the main network and the Fuji test network at any time.
Note.
Do not confuse the network. Your main and test addresses are completely different, but they are accessed using the same mnemonic phrase. When sending money on the main network, make sure you select the main network wallet address and put it in the correct chain.
Ledger support:
Finally, in addition to accessing your Avalanche wallet with a mnemonic passphrase, you can also access it with your Ledger hardware wallet. The Avalanche Wallet supports hardware wallet integration; you can use Ledger Nano S. This will keep your coins safe and sound.
Read more articles about cryptocurrencies and mining at CRYPTO-WALLETS.ORG.
The Telegram channel about cryptocurrency and mining Bitcoin, Ethereum, Monero and other altcoins: